Part 4: Creating Websites with Quarto

OCTRI-BERD Workshop July 2025

Jessica Minnier, Meike Niederhausen

OHSU-PSU School of Public Health

2025-07-22

Outline

  • Sample websites
  • Create Quarto website project
  • File structure of a website
  • Navigation options
  • Blog-style webpage
  • Themes
  • Hosting

Sample websites

Create Quarto website project

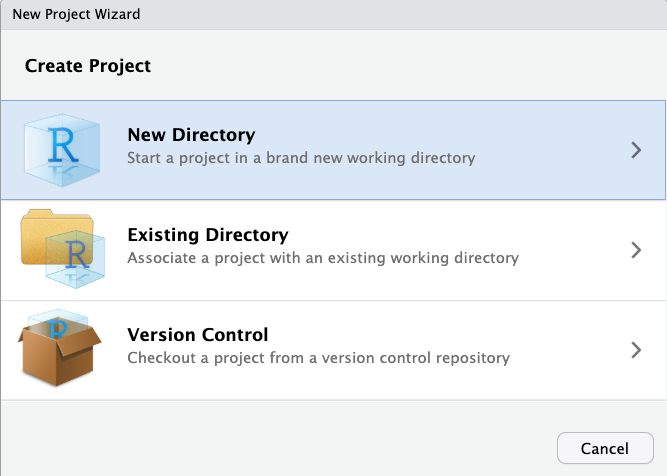
  1. From the R menu, select File -> New Project...
  1. Select New Directory option
    (NOT Existing Directory)

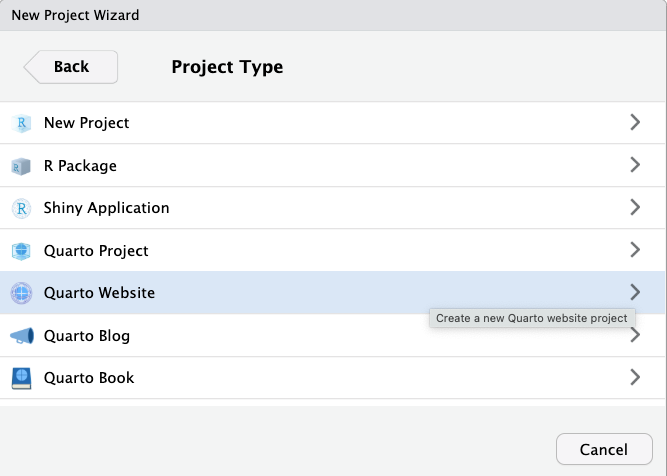
  1. Select Quarto Website from the Project Types

  1. Directory name: Enter the name for your website project folder
  2. Browse to the folder that the website project folder will be saved in
  3. Make sure the Engine is set to Knitr
  4. Optional:
    • Select Create a git repository if you plan on syncing your website to GitHub
    • Select Open in a new session if you want to keep your current R project open

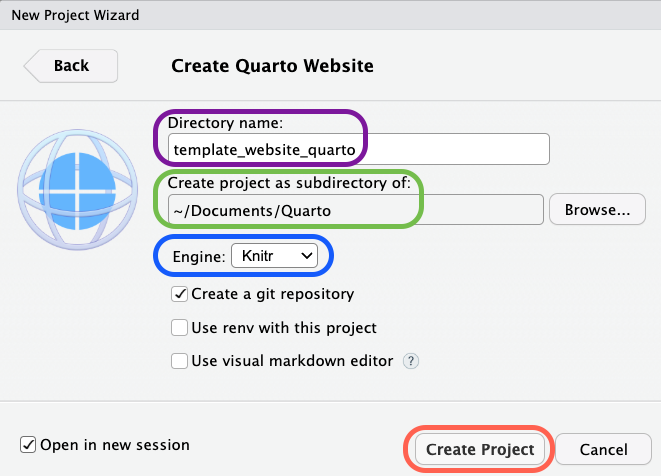
  1. Click on Create Project

Your new Quarto website project should now open up in RStudio

Website file structure

What files are needed to create a Quarto website?

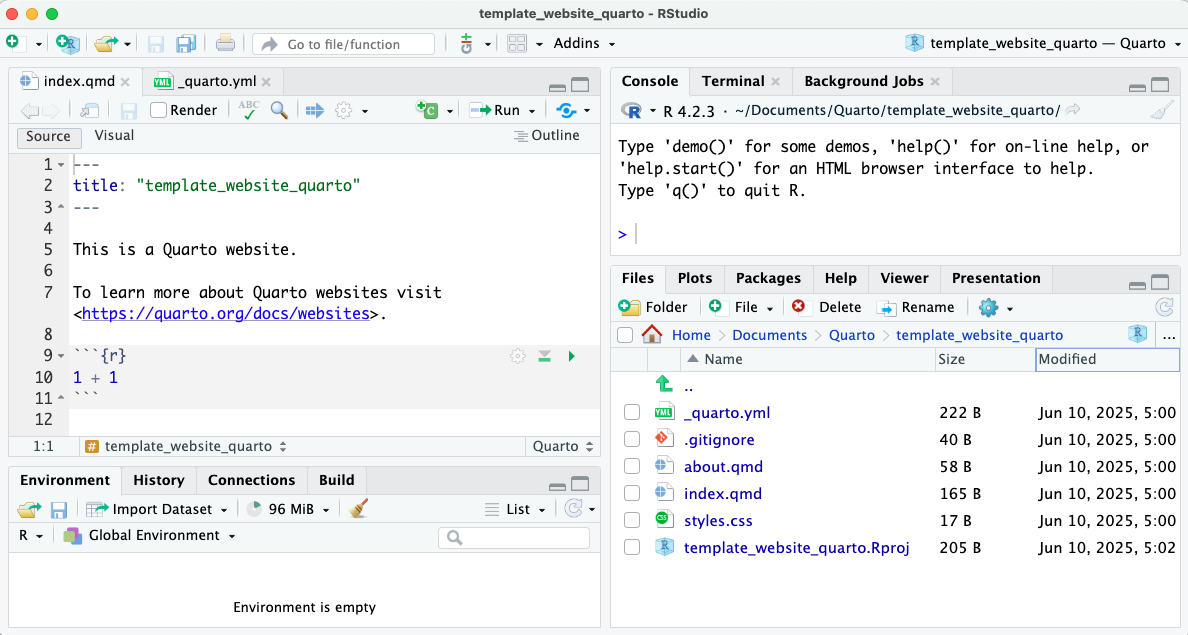
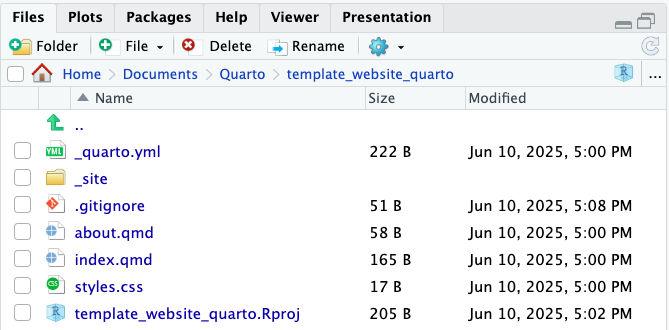
Template (default) website

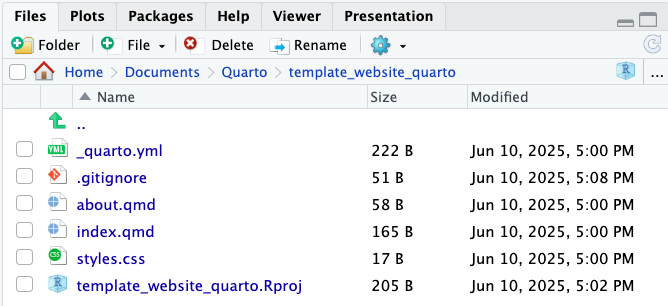
Note: If you do not have GitHub set up, then you will not have the .gitignore file.

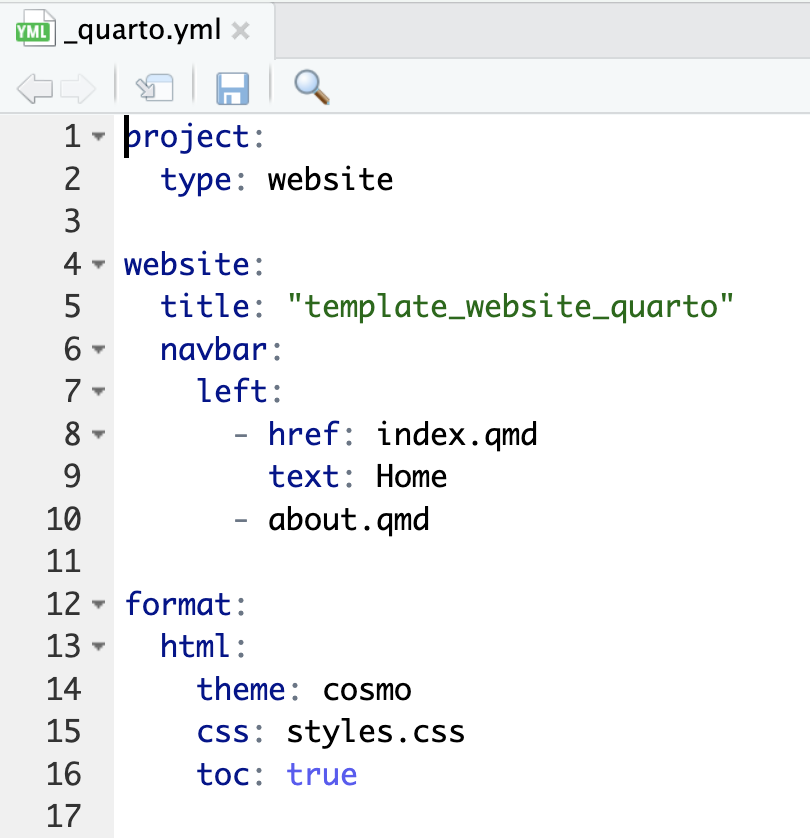
This is the config file that specifies the general structure of the website

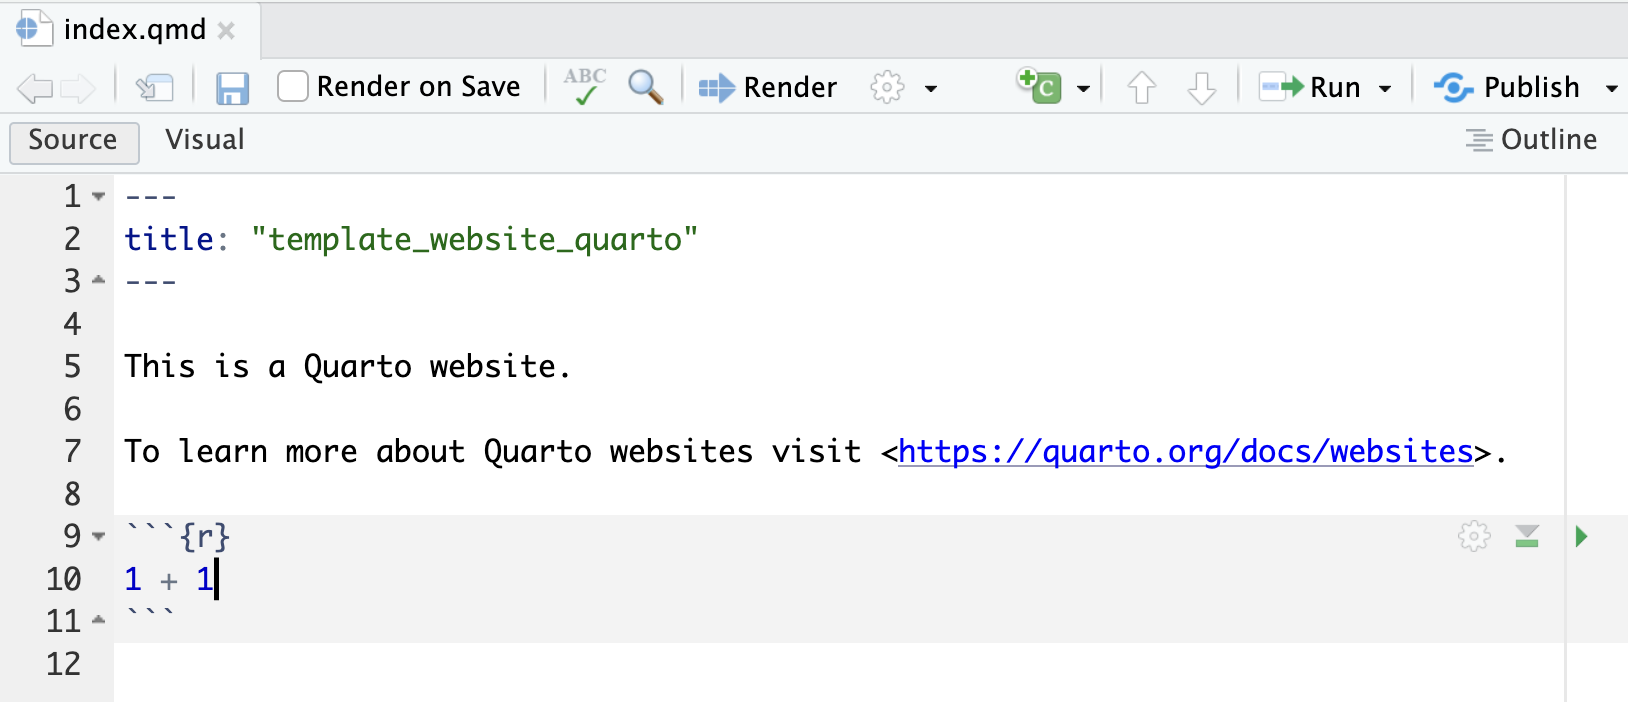
This is the home page of the website

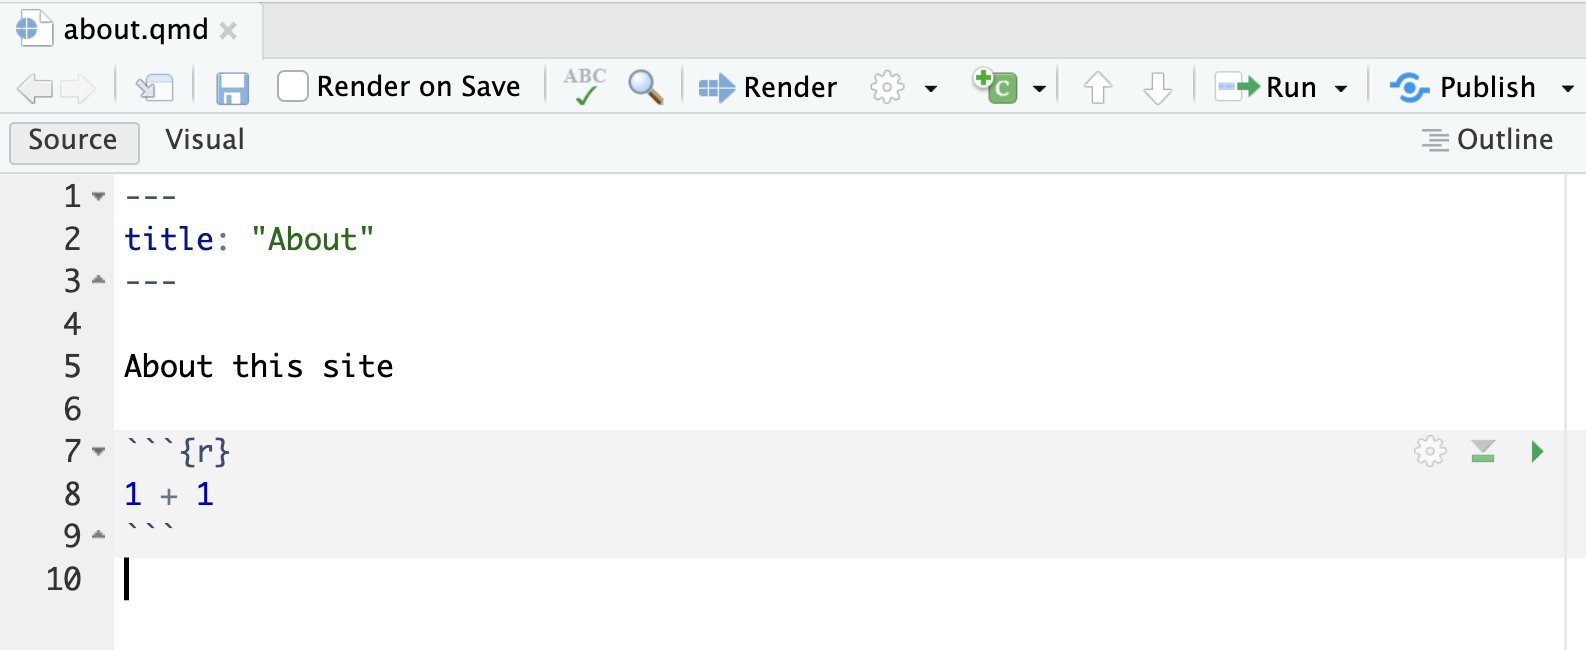
This is an extra (optional) webpage where information about the website can be provided

  • You can render the website by clicking on the Render button, similar to rendering a quarto file.
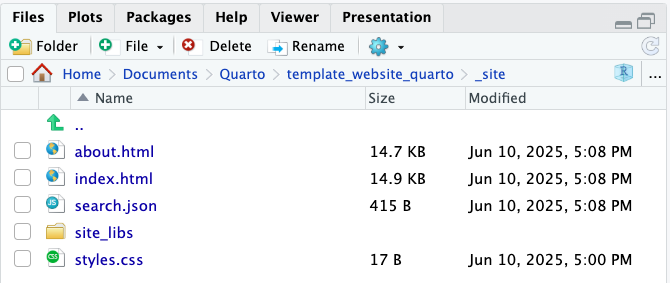
  • The _site folder is created when rendering the website
  • It contains the html files that make up the website

Top vs. Side Navigation

  • The navigation bar at the top of the page is customized with the navbar options in _quarto.yml
  • Use left: and right: to specify which side of the top navigation bar you want the links to appear
  • Other options:
    • background and foreground colors,
    • adding a website search option and logo
    • specifying when the navigation bar is collapsed to a “hamburger” menu
website:
  title: "OCTRI-BERD Quarto 2025"
  navbar:
    background: primary
    foreground: "#fff"
    logo: "/images/cat_laptop.gif"
    search: true
    collapse-below: sm
    left:
      - href: index.qmd
        text: Home
    right:
      - href: about.qmd
        text: About

Learn more: Top Navigation

  • The navigation bar at the left side of the page is customized with the sidebar options in _quarto.yml
  • Use contents: to specify which pages to link to
  • Other options:
    • style: options are "docked" and "floating"
    • adding a website search option on the sidebar (won’t appear if navigation bar already has one)
    • how many navigation levels to display (collapse-level:)
  sidebar:
    style: "docked"
    search: true
    collapse-level: 2
    contents:
      - href: index.qmd
        text: Home
      - href: slides.qmd
        text: Workshop slides as "blog"
      - section: "Section for slides"
        contents: 
          - href: slides/part0_installation.qmd
            text: 0 Installation 
          - href: slides/part1_overview.qmd
            text: 1 Overview
          - href: slides/part2_intro.qmd
            text: 2 Intro to Quarto
          - href: slides/part3_presentations.qmd
            text: 3 Presentations
          - href: slides/part4_websites.qmd
            text: 4 Websites

Learn more: Side Navigation

  • Within the contents: list, sections of related pages can be grouped together with section:
  • For each section:, list the contents:
  • Exampl 1: See the _quarto.yml excerpt in the Options tab
  • Example 2: Sections for weekly pages and homework-related pages from class website; YAML
  • This option was not implemented in the workshop webpage
  • Hybrid navigation allows for each top navigation bar item to have its own contents in the sidebar.

Learn more: Hybrid Navigation

Exercise 1: navigation practice

  1. Add a link to a quarto page to the top navigation bar.
    • You can create a new qmd file to link to, or link to a slide file you created in part 3.


  1. Add a link to a quarto page to the side bar.
    • You can link to the same page as the top bar if you like.

Blog-style webpage

The Workshop Slides link on the left navigation bar of the workshop website is an example of a blog-style webpage

  • To create a blog-style webpage, create a quarto .qmd file, and specify in the yaml
    1. format is html (format: html:)
    2. the folder name containing the qmd files that will be listed on the blog (listing: contents: foldername)
---
title: "Workshop Slides"
format: 
  html:
    listing: 
      contents: slides
      type: table
      table-hover: true
      fields: [date, title]
      sort: "title asc"
      date-format: "short"
    link-external-newwindow: true
---

Blog-style qmd YAML

---
title: "Workshop Slides"
format: 
  html:
    listing: 
      contents: slides
      type: table
      table-hover: true
      fields: [date, title]
      sort: "title asc"
      date-format: "short"
    link-external-newwindow: true
---

Individual qmd YAML

  • The Example’s table of files included the date and title specified in each of the individual .qmd files’ YAMLs
  • Excerpt of YAML:
---
title: "Part 4: Creating Websites with Quarto"
date: "7/22/25"
format: 
  revealjs
---

Blog-style qmd YAML

---
title: "Weekly Pages"
format: 
  html:
    listing: 
      contents: weeks
      type: table
      table-hover: true
      fields: [date, title, description]
      sort: "date asc"
      date-format: "short"
    link-external-newwindow: true
---

Individual qmd YAML

  • Excerpt of YAML with description::
---
title: "Week 1"
description: "Intro to R/RStudio, Functions, Vectors, Data Types"
date: "1/09/2025"
date-modified: "today"
format: 
  html
---

Blog-style qmd YAML

---
title: "Class Slides"
format:
  html:
    listing: 
      contents: slides
      type: table
      fields: [date, title, categories]
      table-hover: true
      sort: "date asc"
      date-format: "short"
      categories: true
    link-external-newwindow: true
---

Individual qmd YAML

  • Excerpt of YAML with categories::
---
title: "Day 1: Intro to R & Rstudio"
subtitle: "BSTA 511/611 Fall 2023, OHSU"
author: "Meike Niederhausen, PhD"
date: "09/27/2023"
categories: ["Week 1"]
format: 
  revealjs
---

Themes

A website’s theme specifies colors, fonts, and much more!

Change the look of your website with themes

  • Theme is specified in _quarto.yml

  • Easy way:

  • Medium difficulty:

    • Modify a Bootswatch theme.
    • Theme scss files can be downloaded from GitHub
  • Challenge:

    • Write your own theme!
  • See excerpt on right
  • The cosmo theme was originally chosen
  • Any changes made in cosmo_modified.scss overwrite the cosmo theme since it is listed last.
format:
  html:
    theme: 
      - cosmo
      - cosmo_modified.scss
    css: styles.css
    toc: true
  • Changes made to cosmo.scss
    • Hexadecimal color for green changed:
      • $green: #08875d !default;
    • Primary color changed from blue to purple:
      • $primary: $purple !default;
    • Success color change from green to blue:
      • $success: $blue !default;

Exercise 2: time for a new theme!

  1. Change the theme for your website.

Publish your website (or webpage)

Hosting options


  • In the Terminal window (not the Console!) of RStudio,
    • type quarto publish quarto-pub
    • follow the instructions
      • will be prompted to give Quarto Pub account info if not already done so

Learn more about Quarto Pub

  • Free & files are publicly visible.
  • This option is more involved to set up.
  • Requires a GitHub account that is synced with your computer.
    • I highly recommend following Jenny Bryan’s Happy Git and GitHub for the useR Pre-workshop set-up instructions for getting your RStudio connected with GitHub.

  • Google doc we created with instructions to sync a Quarto website to GitHub

See more options (including Netlify) at Quarto’s Publishing Basics page.

Thank you!!!

Contact:

Jessica Minnier
minnier@ohsu.edu

Meike Niederhausen
niederha@ohsu.edu